Create a new Symbol account to start sending and receiving transactions.
Complete the getting started section.
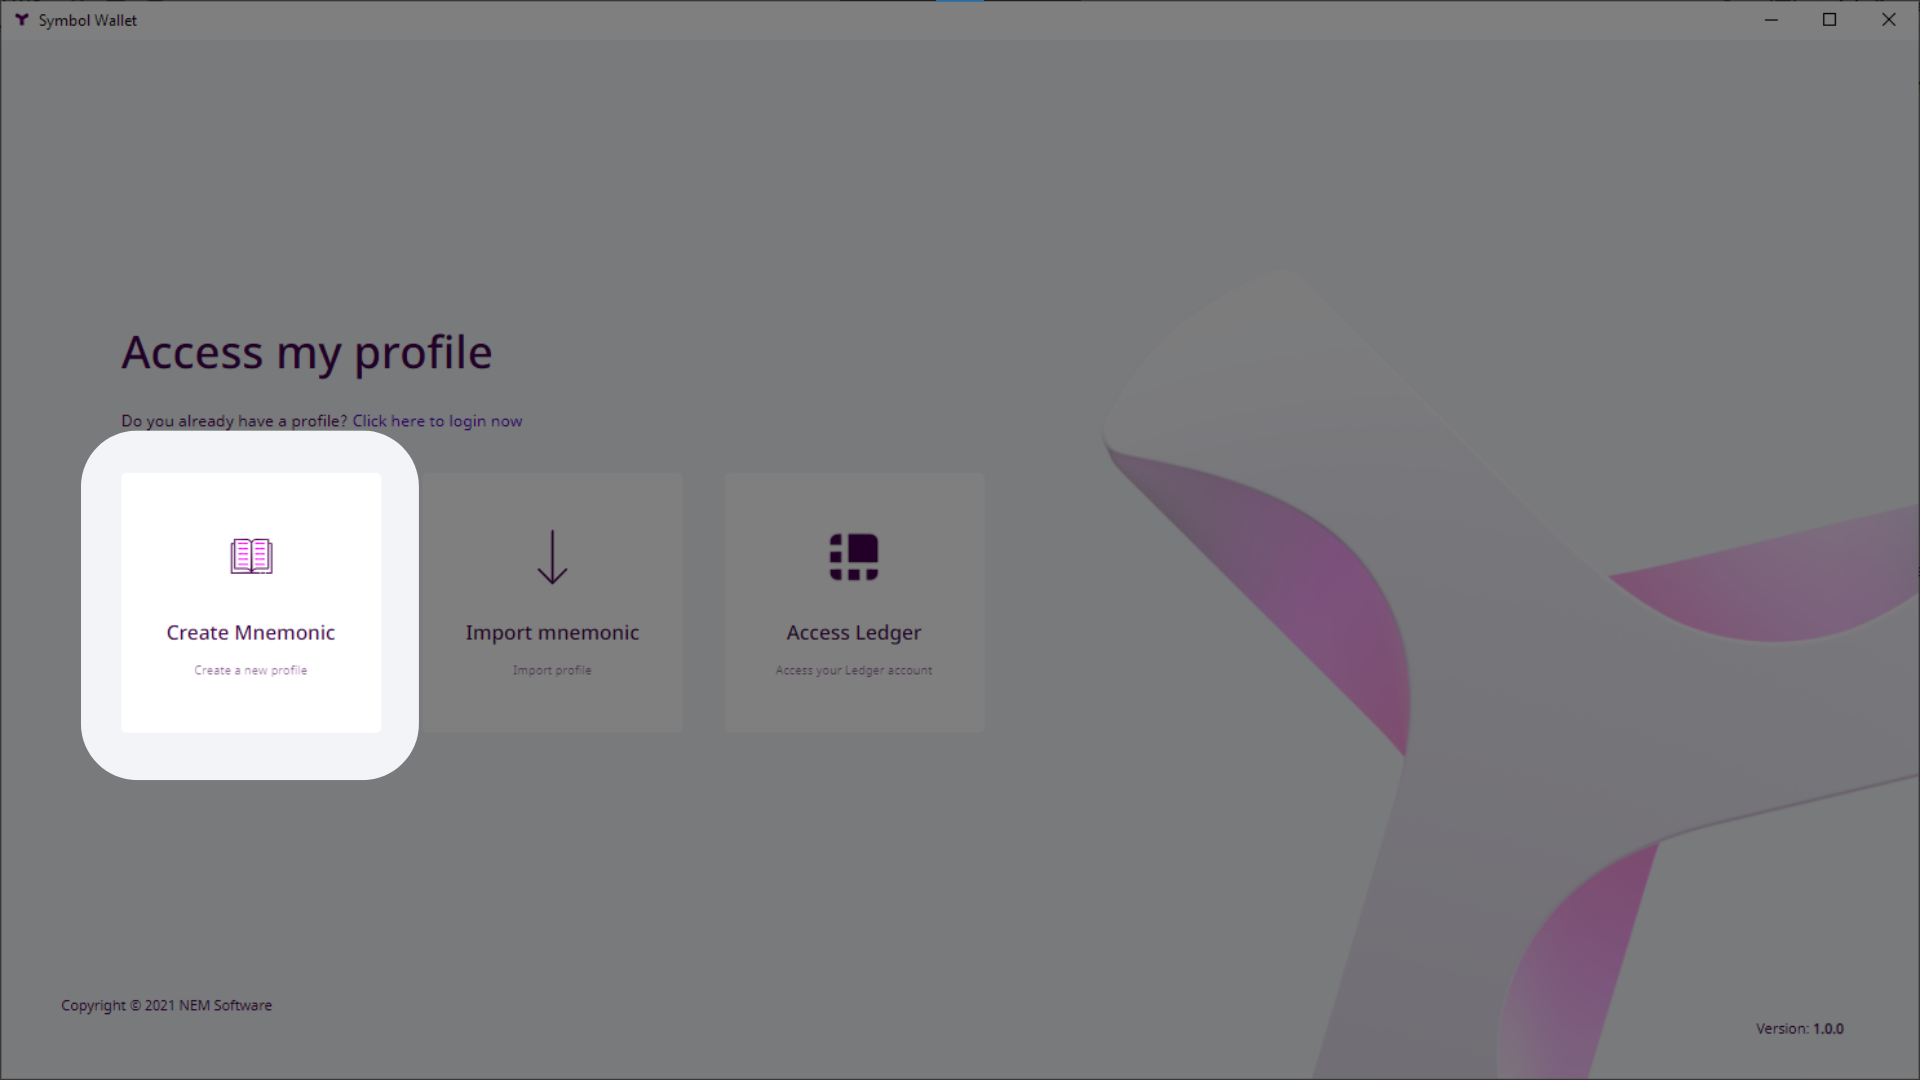
Open up the Symbol Desktop Wallet application and click on Create a new profile?.

Click on Create Mnemonic.
Fill in some profile data. A profile can contain several Symbol accounts and it helps keeping them organized.
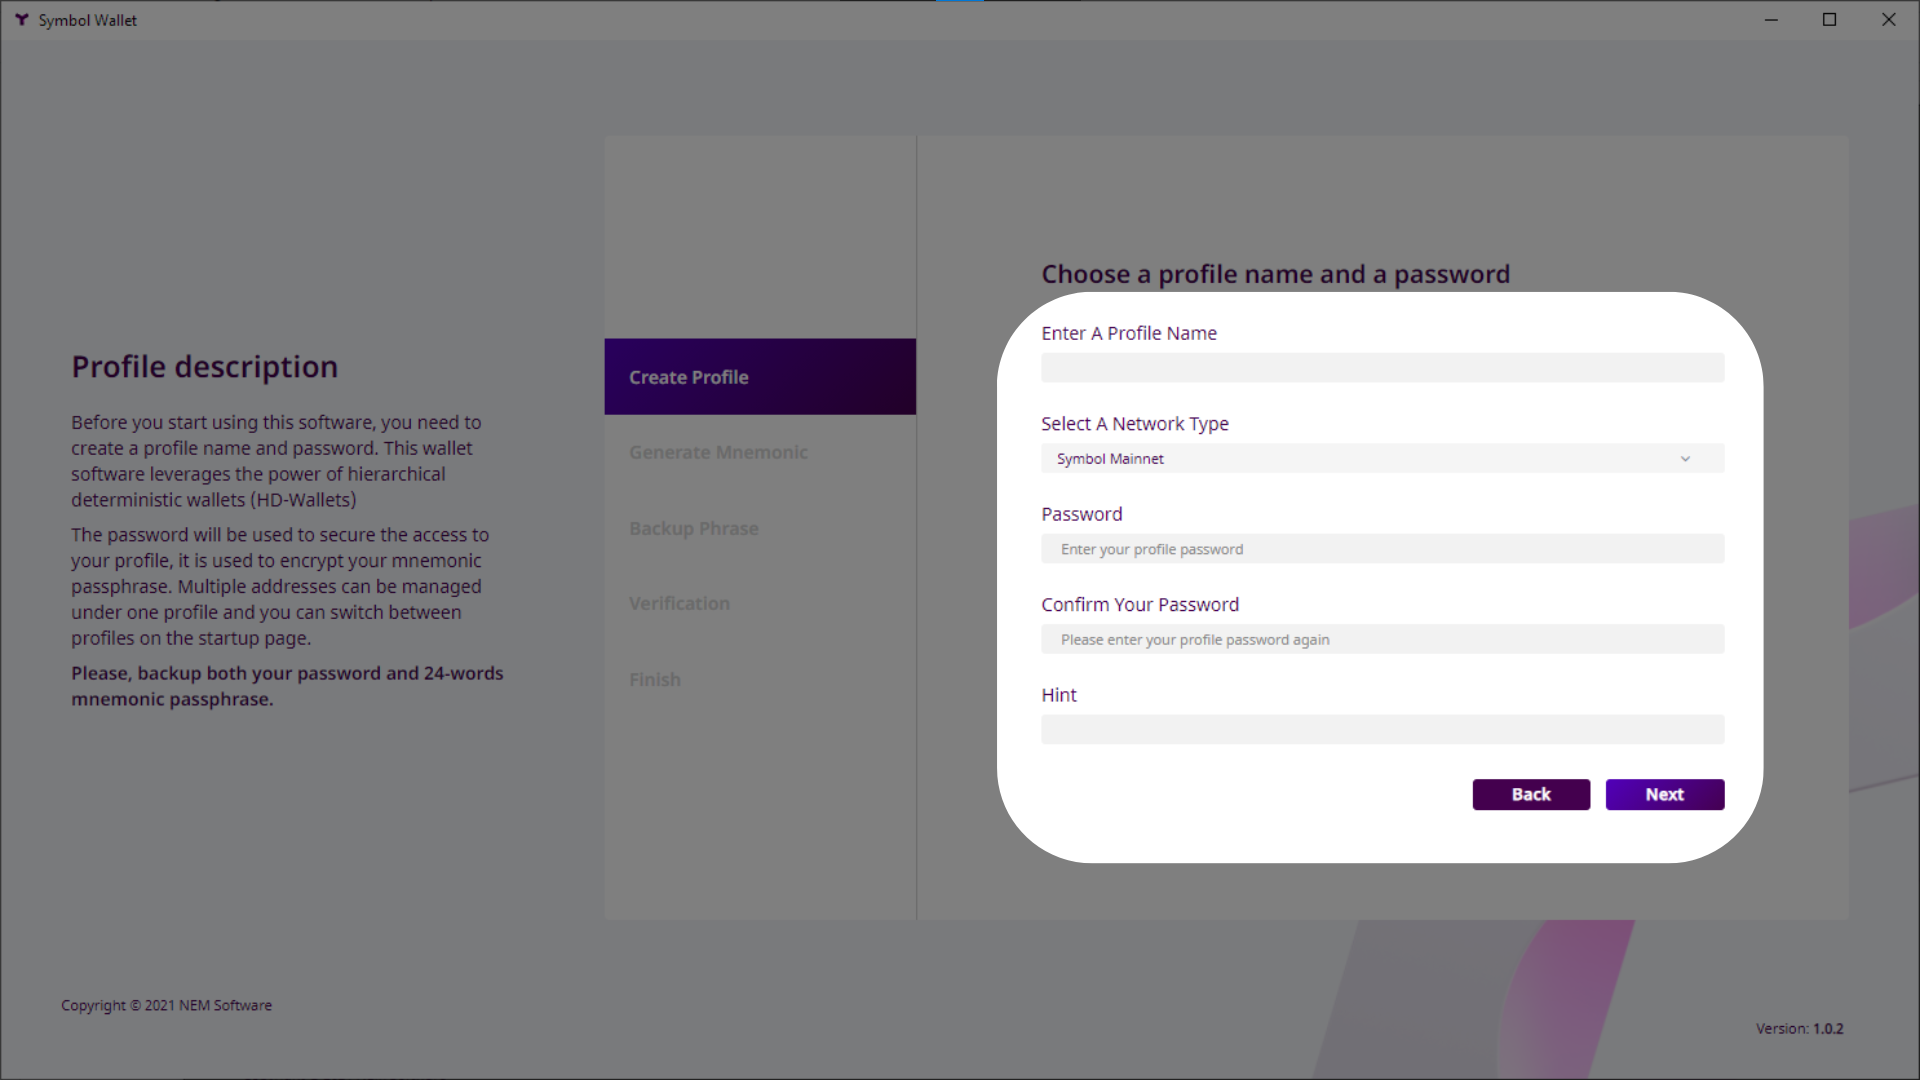
Give your profile a name, for your personal use.
Select the Mainnet Network type.
Enter a password to protect your profile and confirm it.
Enter a hint to help you remember your password, should you forget it.
Click on Next.
On the next page, the Desktop Wallet uses the movement of your mouse to generate a random mnemonic phrase for your wallet.
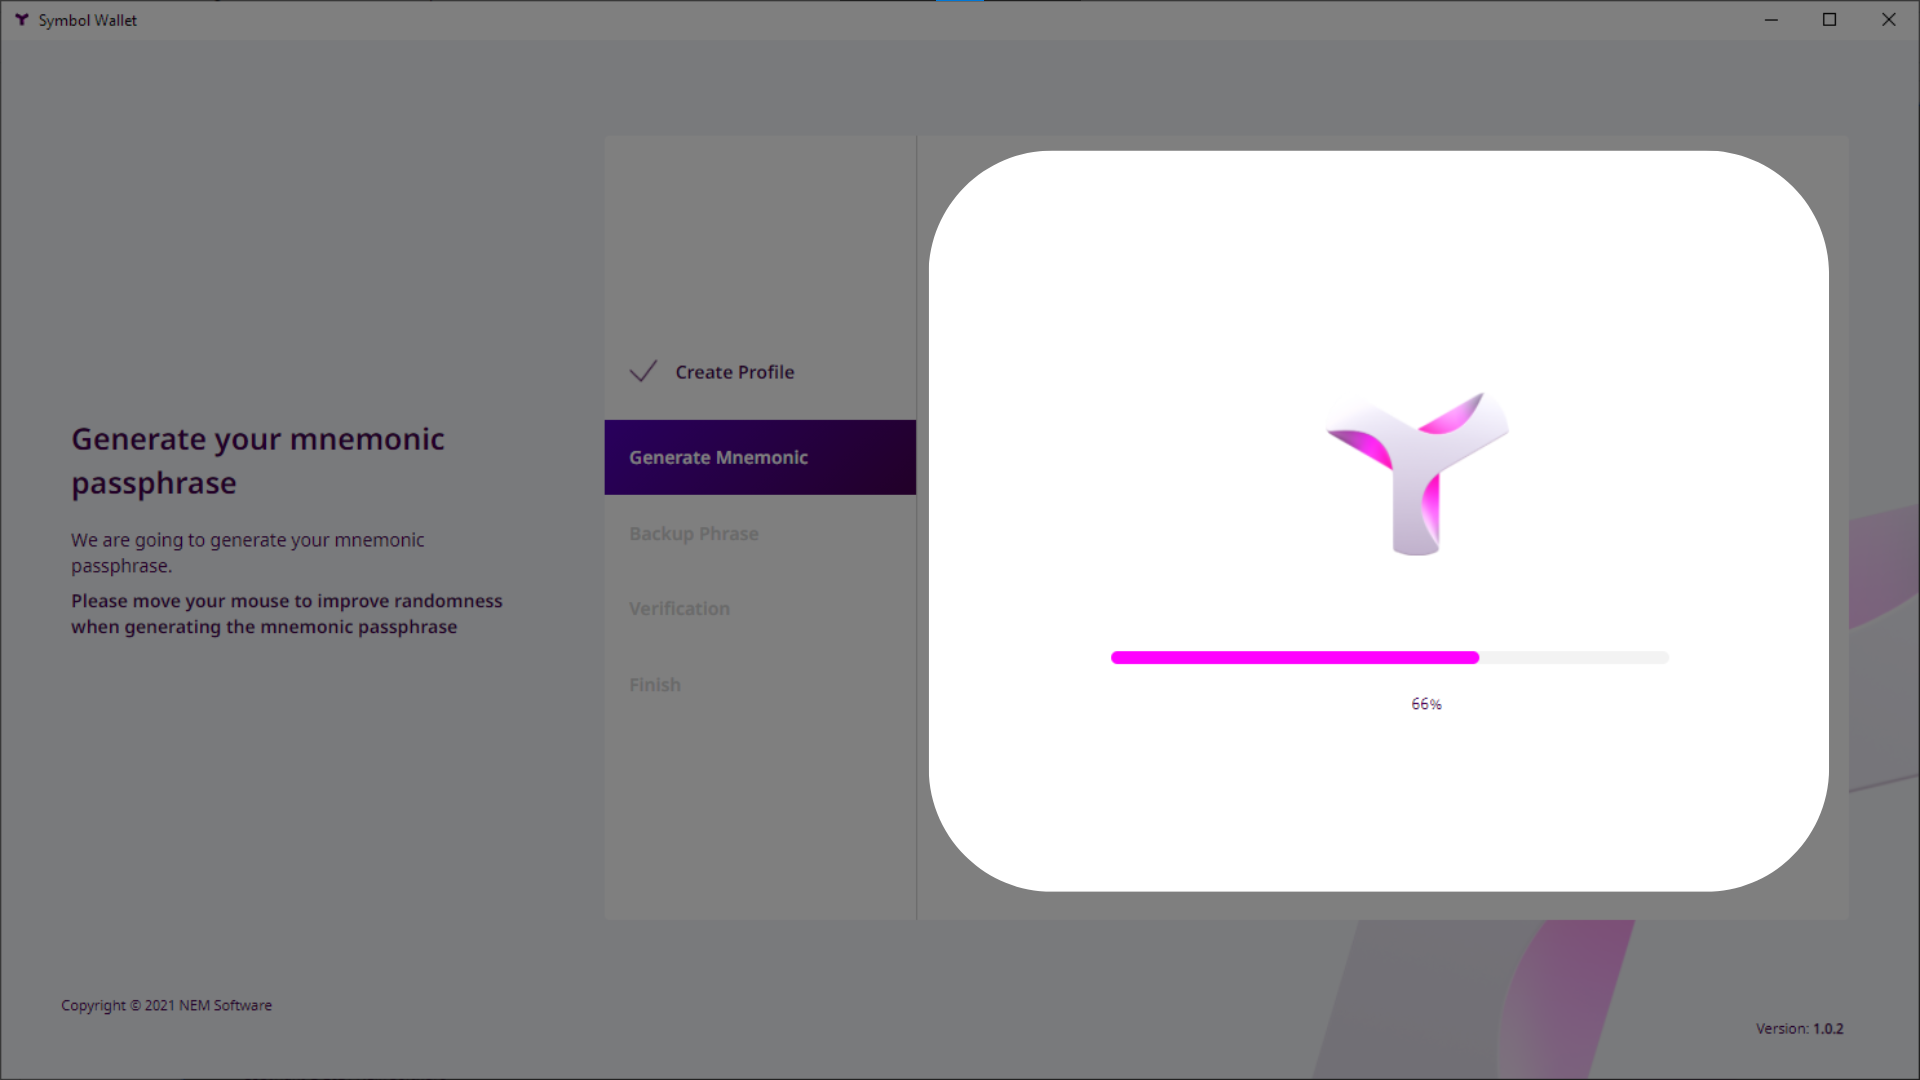
Move your mouse around the screen until the progress bar reaches 100% and the application automatically moves you to the next page.
Click Display mnemonic words to view your private mnemonic phrase.
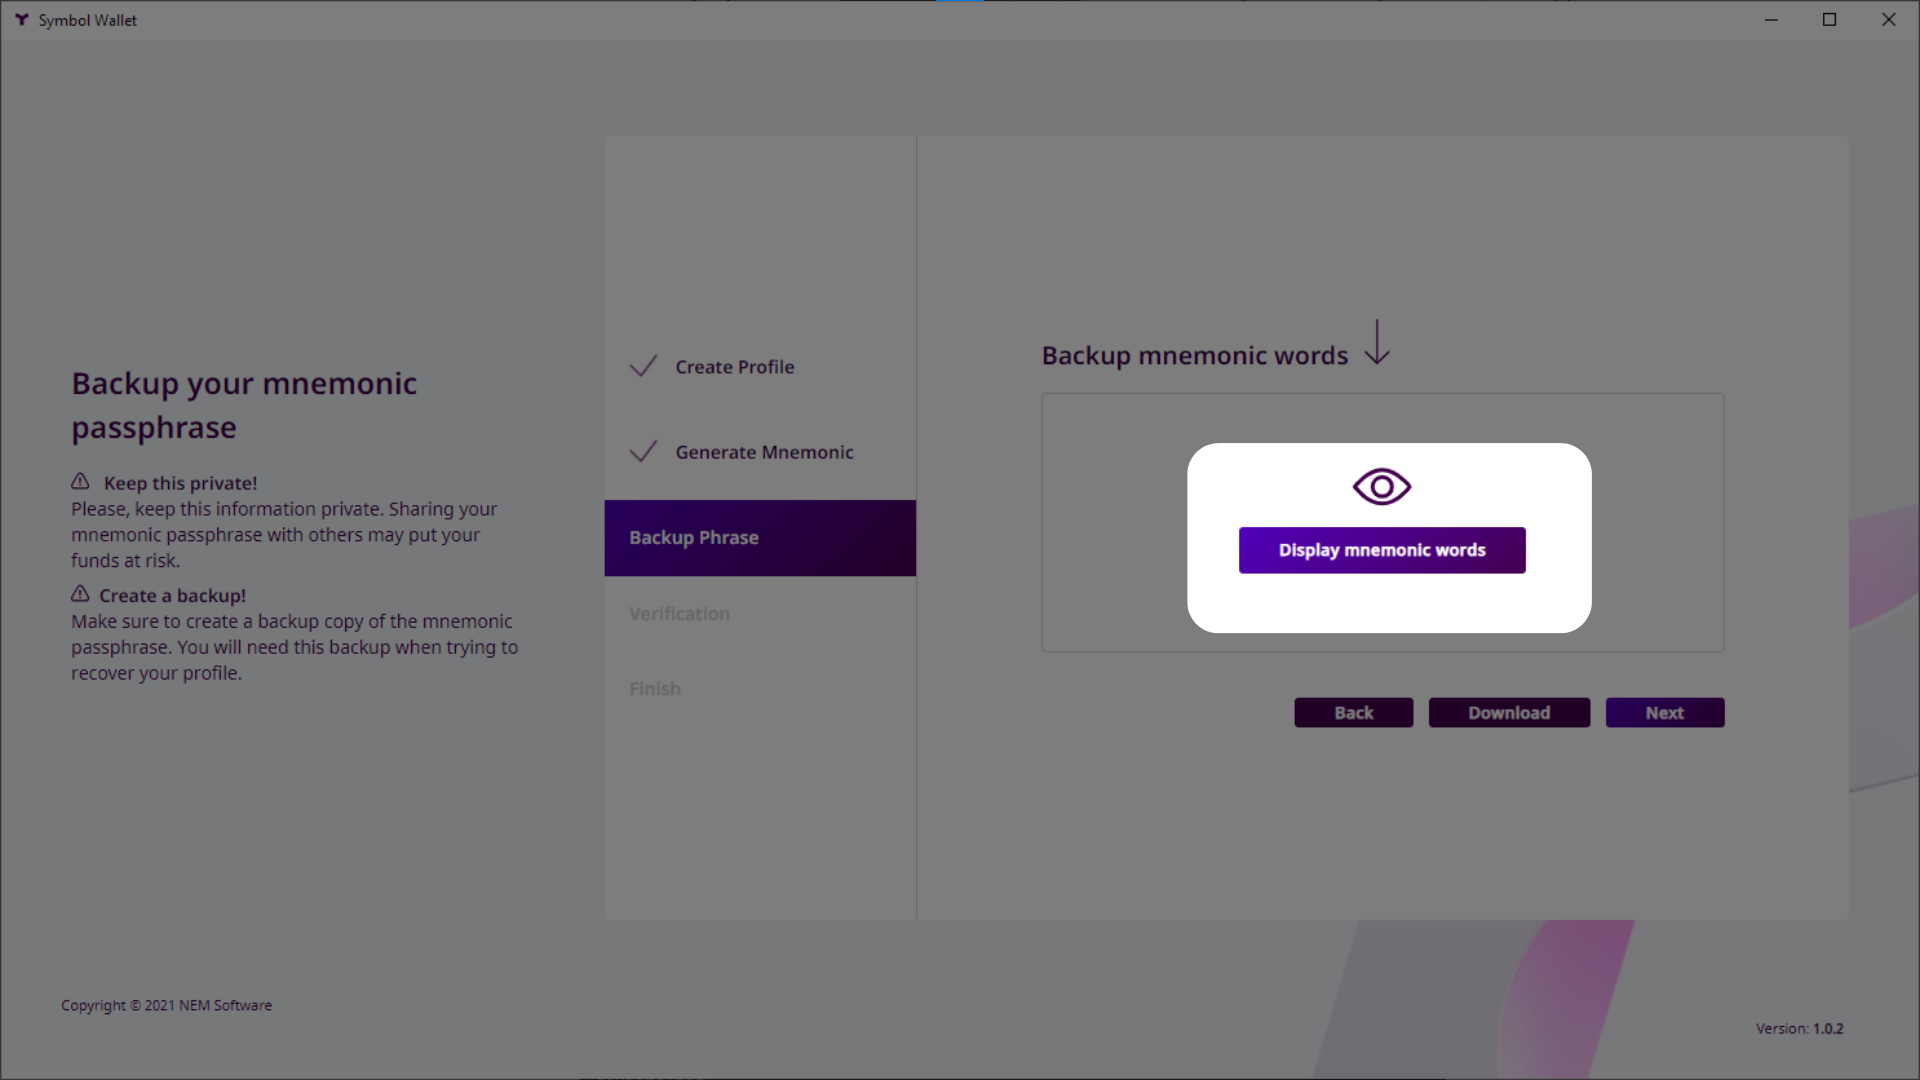
Click on the copy button.
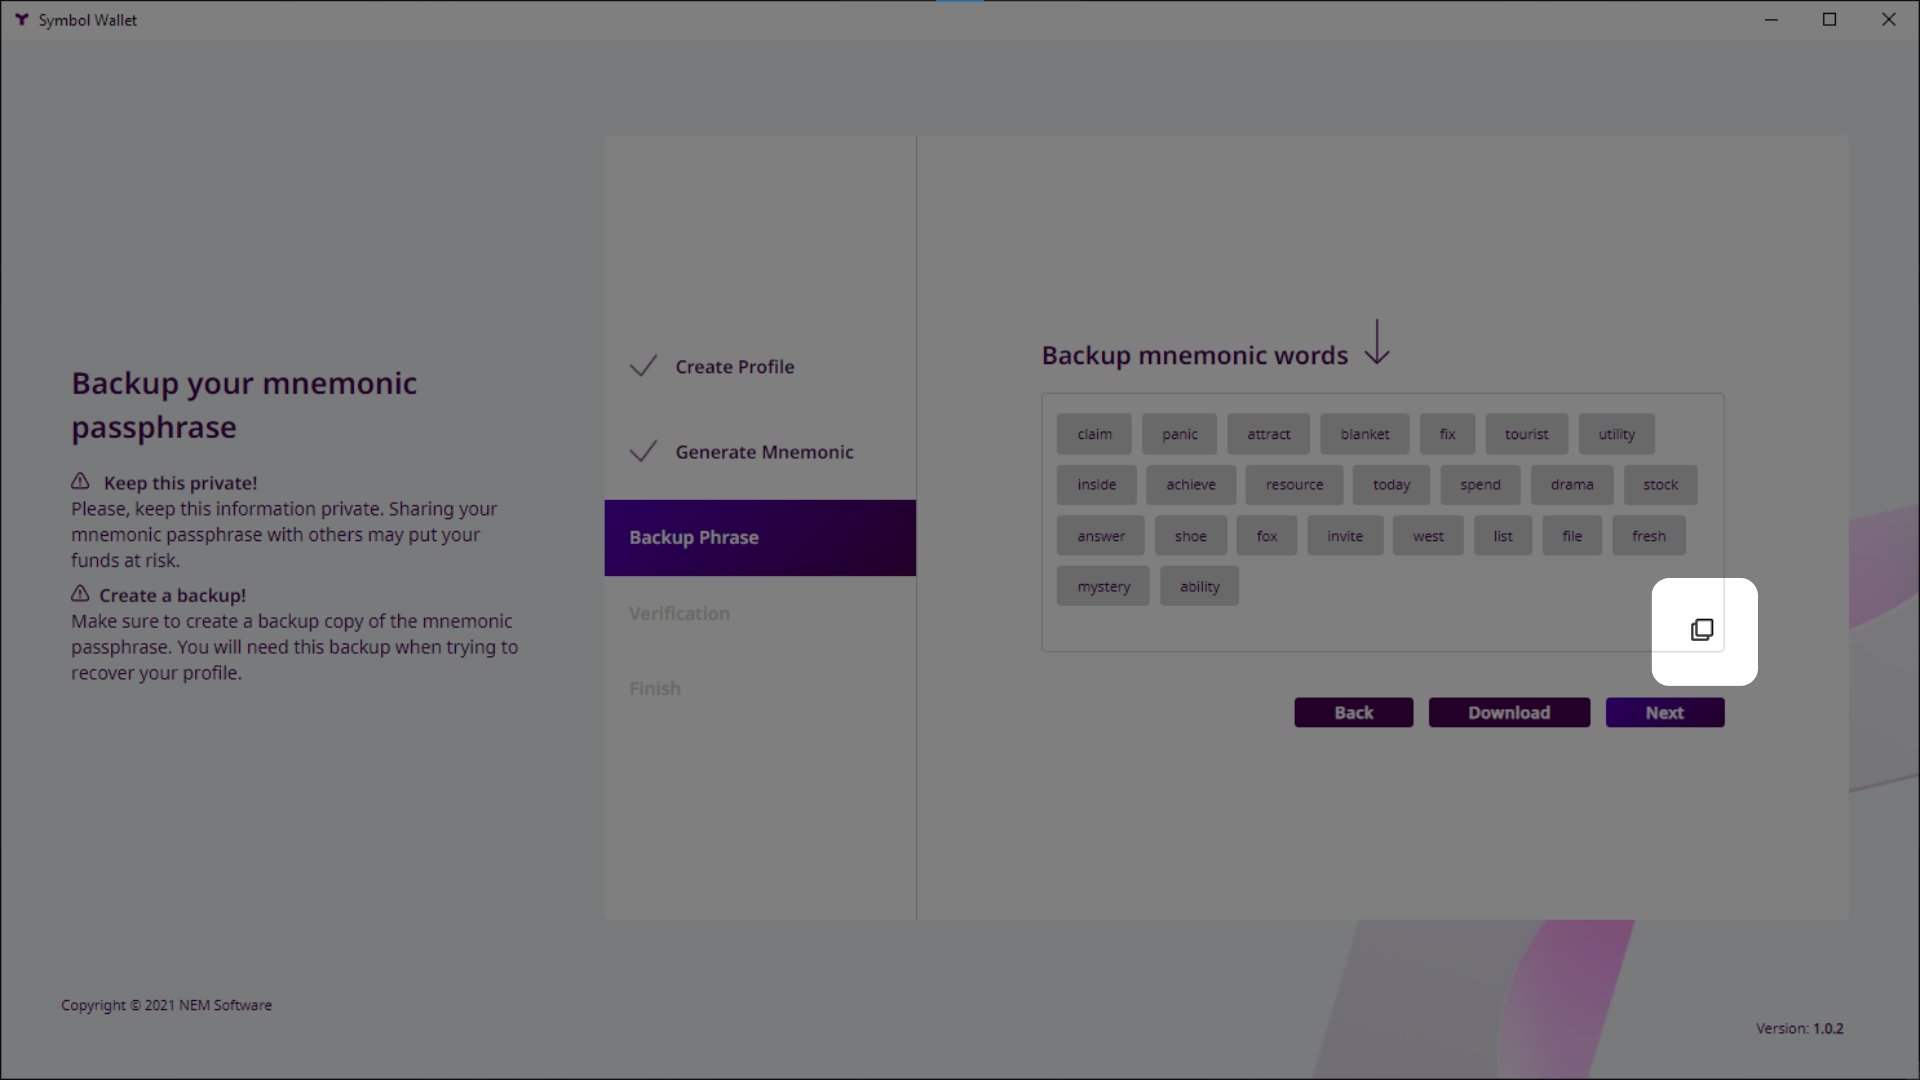
Backup this information securely offline and do not share it with anyone, as it stores the key to recover your assets. Click Next.
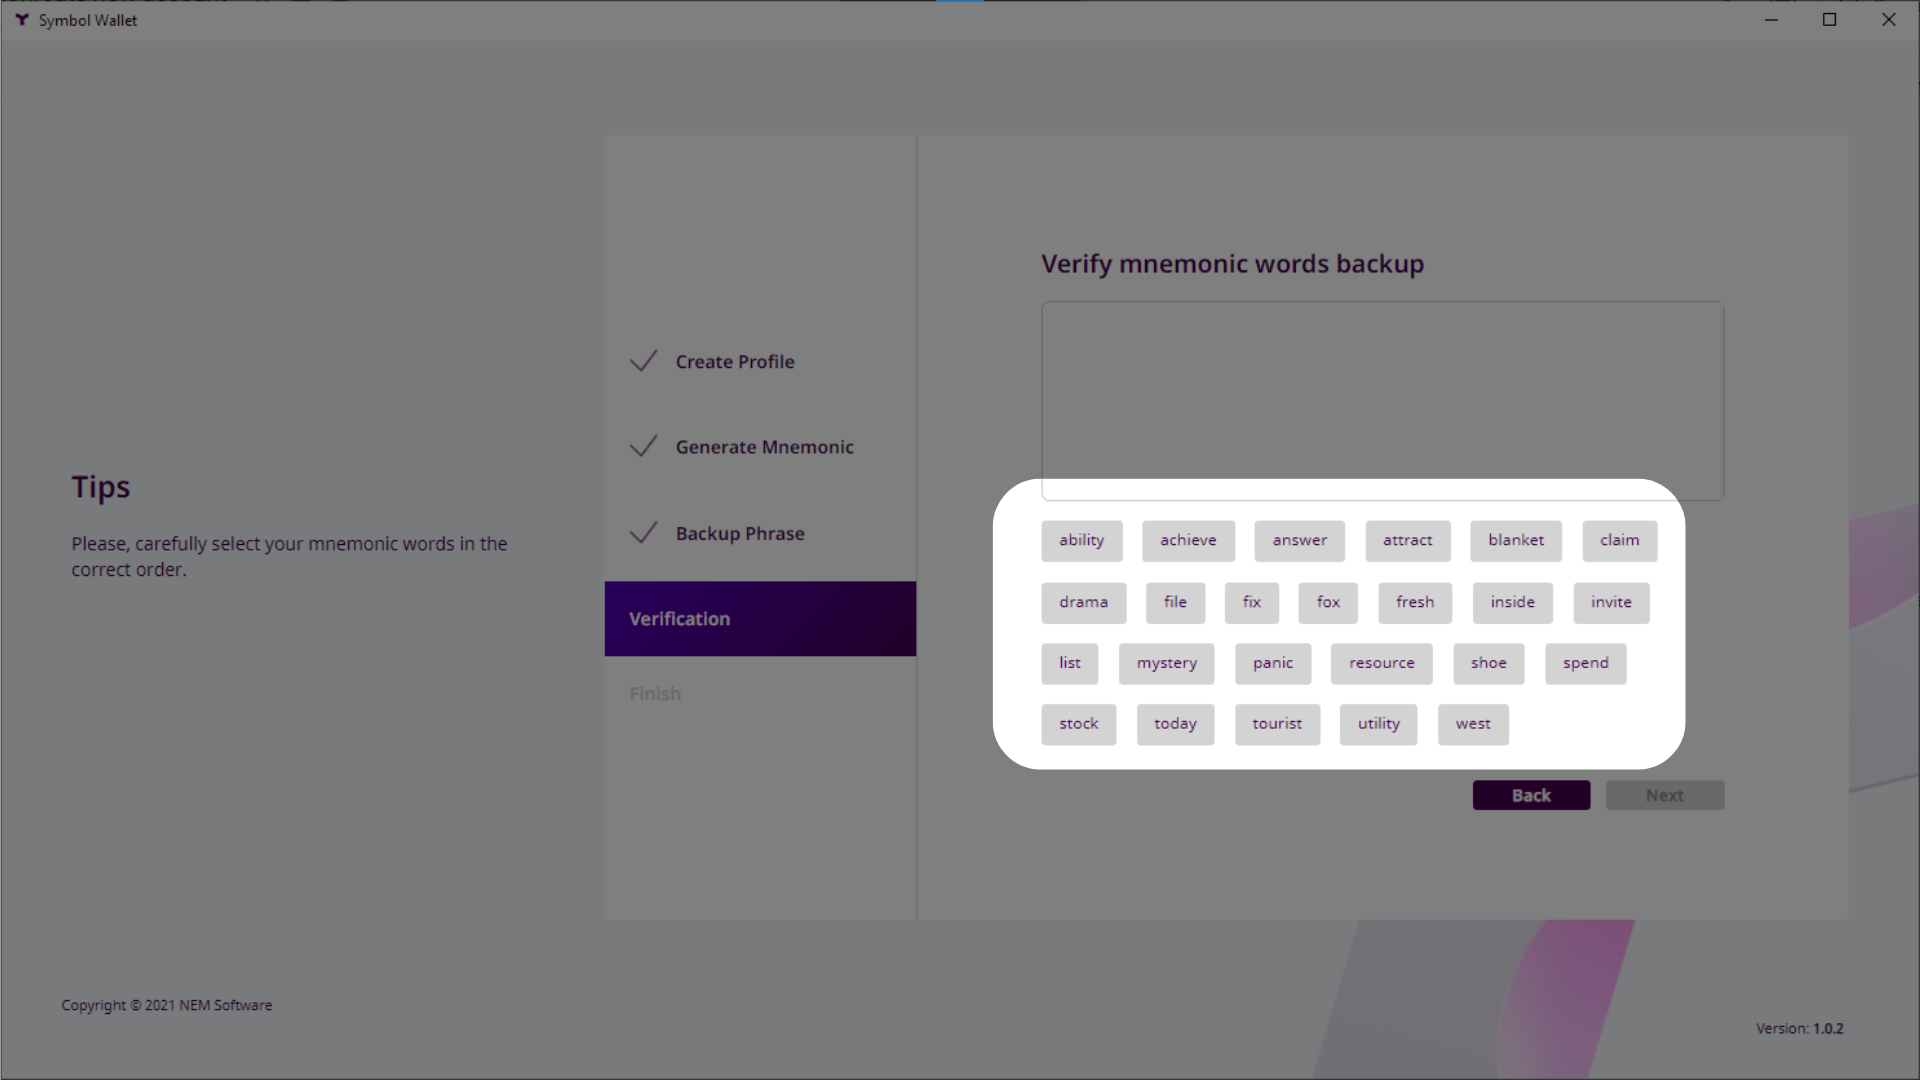
Verify that you have backed up your mnemonic phrase correctly. Click each word in the phrase in the correct order. Click Next when done.
Read the safety tips on the next page.
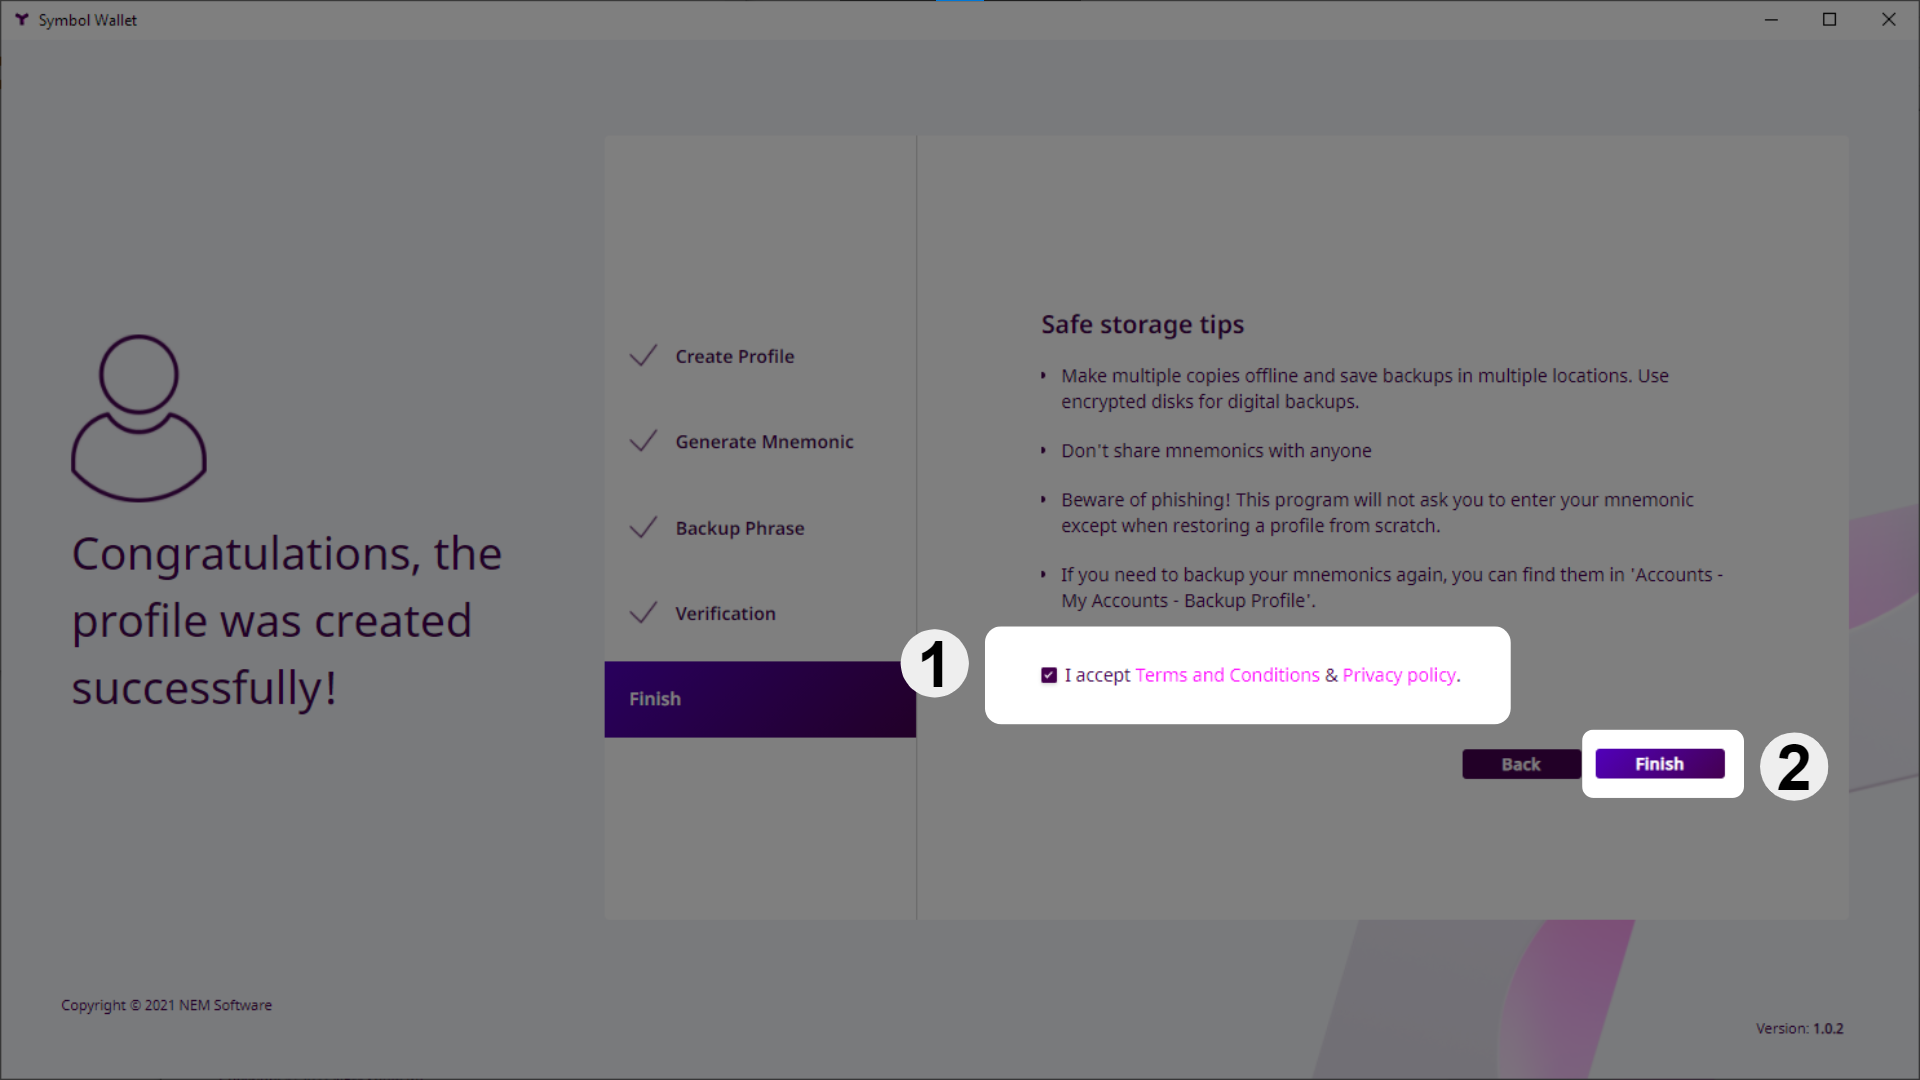
Accept the Terms and Conditions and click on Finish:
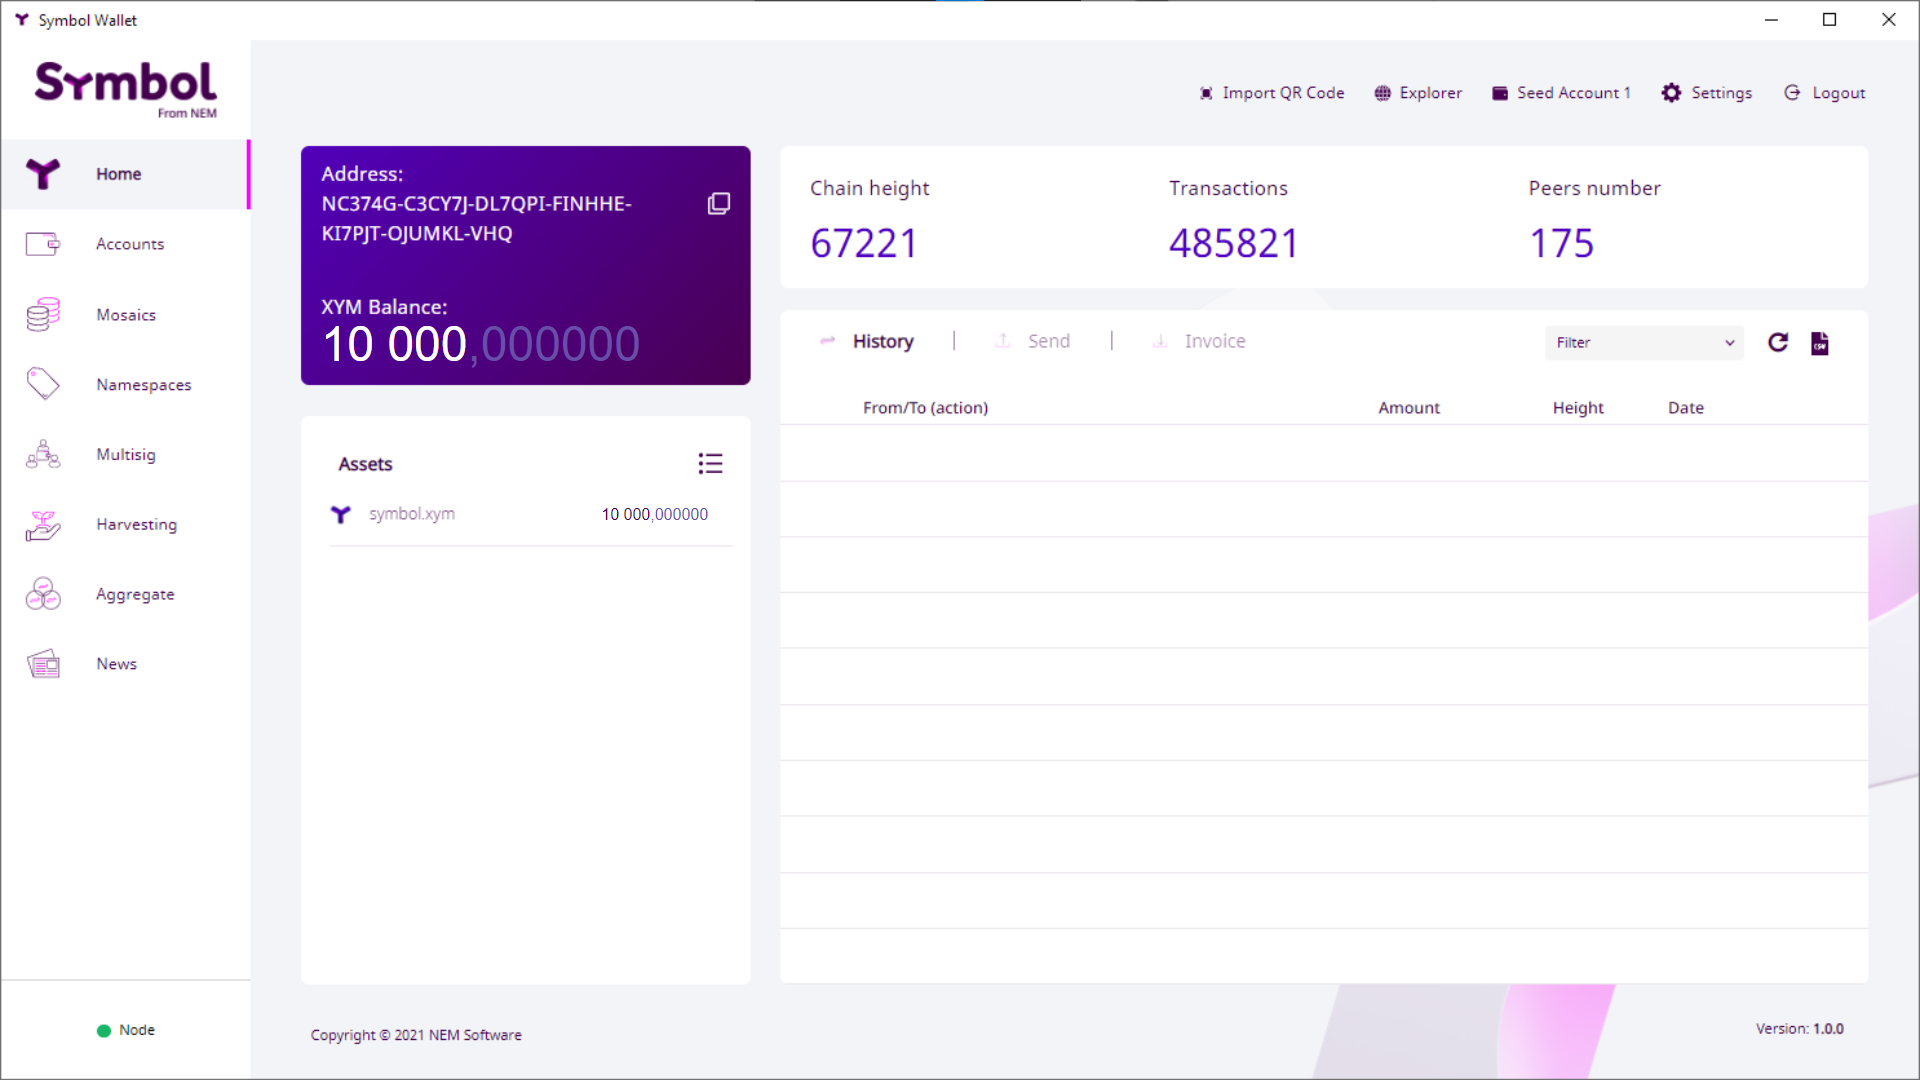
The Wallet’s main screen will appear. Congratulations! Your account is ready to use.
Open a new file and run the following code snippet.
Edit NetworkType.TEST_NET to select the correct network type for your desired purpose.
const account = Account.generateNewAccount(NetworkType.TEST_NET);
console.log(
  'Your new account address is:',
  account.address.pretty(),
  'and its private key',
  account.privateKey,
);
const account = symbol_sdk_1.Account.generateNewAccount(
  symbol_sdk_1.NetworkType.TEST_NET,
);
console.log(
  'Your new account address is:',
  account.address.pretty(),
  'and its private key',
  account.privateKey,
);
        final Account account = Account.generateNewAccount(NetworkType.TEST_NET);

        System.out.printf("Your new account address is: %s and its private key: %s",
            account.getAddress().plain(), account.getPrivateKey());
If you already have a private key, you can use it to define a new Account object.
// replace with private key
const privateKey =
  '0000000000000000000000000000000000000000000000000000000000000000';

const account = Account.createFromPrivateKey(privateKey, NetworkType.TEST_NET);
console.log(
  'Your account address is:',
  account.address.pretty(),
  'and its private key',
  account.privateKey,
);
// replace with private key
const privateKey =
  '0000000000000000000000000000000000000000000000000000000000000000';
const account = symbol_sdk_1.Account.createFromPrivateKey(
  privateKey,
  symbol_sdk_1.NetworkType.TEST_NET,
);
console.log(
  'Your account address is:',
  account.address.pretty(),
  'and its private key',
  account.privateKey,
);
        // Replace with a private key
        final String privateKey = "0000000000000000000000000000000000000000000000000000000000000000";
        final Account account = Account.createFromPrivateKey(privateKey, NetworkType.TEST_NET);

        System.out.printf("Your account address is: %s and its private key: %s",
            account.getAddress().plain(), account.getPrivateKey());
Open a terminal window and run the following command.
symbol-cli account generate
 Last updated by